Begin installation
Let's start.
Make sure you have everything ready - your PC and the installation disk(s).
- If you are installing SUSE as a virtual machine, make sure your VMware Player or Server are properly configured and that you have the necessary .vmx and .vmdk files.
- If you are installing SUSE for real, make sure that you have dedicated the necessary space on your hard disk for the installation - it can be an existing partition or some free space.
To begin the installation:
- Place the SUSE installation DVD in the DVD-ROM tray.
- Start the VMware Player / Server and open the SUSE .vmx file (e.g. named suse.vmx).
With the (virtual) PC booting, hit Esc button to enter the BIOS setup. Select option 3. CD-ROM Drive. Hit Enter to start booting from CD.
Note: Although the boot option refers to CD-ROM, if you have a physical DVD drive with a DVD disk inserted in it, VMware Player / Server will treat it correctly.
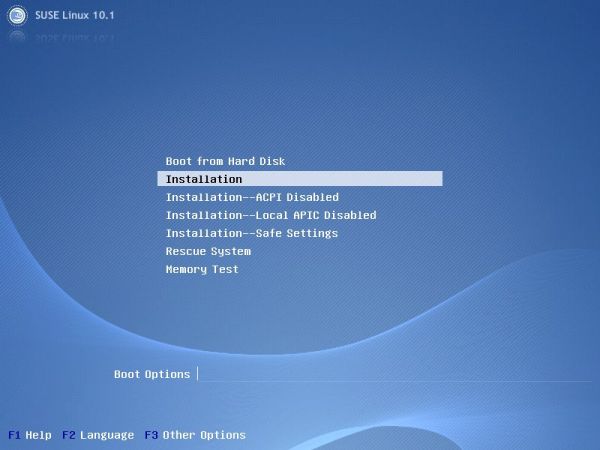
After a few seconds, SUSE Linux DVD will boot and present you with several options. SelectInstallation and press Enter.

Next, you will be presented with the License Agreement. After reading through, check mark the Yes, I Agree to the License Agreement button and click Next to continue.

The installer will now conduct a System Analysis. It will probe the remaining hardware for compatibility. You do not need to do anything at this stage.

Following a successful hardware inspection, you will be prompted to start the installation. Theoretically, if you had a previous version of SUSE installed, you might want to choose to Update. However, since our virtual hard disk is empty, this option is grayed out.
Include Add-On Products from Separate Media refers to other programs that you might want to include and are NOT on the installation DVD. At this stage, we will install only our 'basic' DVD. Leave the checkbox unmarked.
Select New Installation and click Next.

You will be prompted to select your Clock and Time Zone. Make your choices and clickNext.

Now you need to choose between desktop environments that you want to use. Personally, I prefer KDE. For someone who has never used Linux, I feel KDE would be a better choice for two reasons - it feels more Windows-like and is absolutely dead-sexy. Not to be slighted, GNOME is also very nice and user-friendly, and eventually, it should come to personal taste.
Other desktops might not be included in the package and you might be prompted for extra CD / DVDs. Leave the other options for a next Linux install. In the meanwhile, limit your choice between GNOME and KDE.
Select your desktop and click Next.

Source : http://www.dedoimedo.com


0 komentar:
Post a Comment